
Table of Contents
Preserving Surplus Food: How Drying Can Reduce Waste and Save Money
With rising food costs and growing concerns over food waste, drying food at home is an excellent way to extend the shelf life of surplus produce, meats, seafood, and dairy. Grocery liquidators, farms, and food distributors often sell surplus perishables at discounted prices, providing an opportunity for individuals to preserve them for future use. Whether using an oven, a food dehydrator, or even sunlight, drying food helps reduce waste while ensuring a long-term supply of nutritious ingredients.
Why Drying Food is a Smart Choice
- Saves Money – Buying discounted produce and perishables in bulk and preserving them ensures you get the most value for your money.
- Reduces Food Waste – Instead of throwing away overripe fruits, extra vegetables, or soon-to-expire meat and seafood, drying allows them to be stored for months.
- Enhances Food Security – Preserved food can be used in times of inflation, supply shortages, or emergency situations.
- Retains Nutritional Value – Dried food retains most of its nutrients and flavor, making it a healthy addition to meals.
Best Foods to Dry
Many foods can be dried for future use, including:
Fruits
- Apples, bananas, mangoes, pineapples, pears, berries, cherries, figs, dates, and citrus peels.
- Uses: Add to cereals, trail mixes, smoothies, baked goods, or eat as a snack.
Vegetables
- Carrots, bell peppers, tomatoes, onions, mushrooms, potatoes, zucchini, green beans, corn, and leafy greens.
- Uses: Rehydrate for soups, stews, casseroles, or stir-fries.
Herbs and Greens
- Basil, parsley, cilantro, mint, rosemary, thyme, spinach, kale.
- Uses: Store for seasoning, herbal teas, or cooking.
Meat, Poultry, and Seafood
- Beef, chicken, turkey, fish, shrimp.
- It is ideal to marinate them with salt, vinegar, spices and herbs for better taste and longevity.
- Uses: Jerky, soups, stews, emergency food supplies.

Dairy Products
- Cheese, yogurt, eggs (as powdered eggs).
- Uses: Store dried cheese for seasoning or use powdered dairy in baking and cooking.
Methods of Drying Food
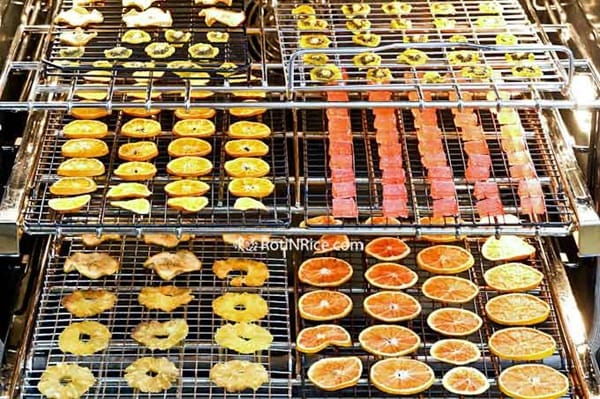
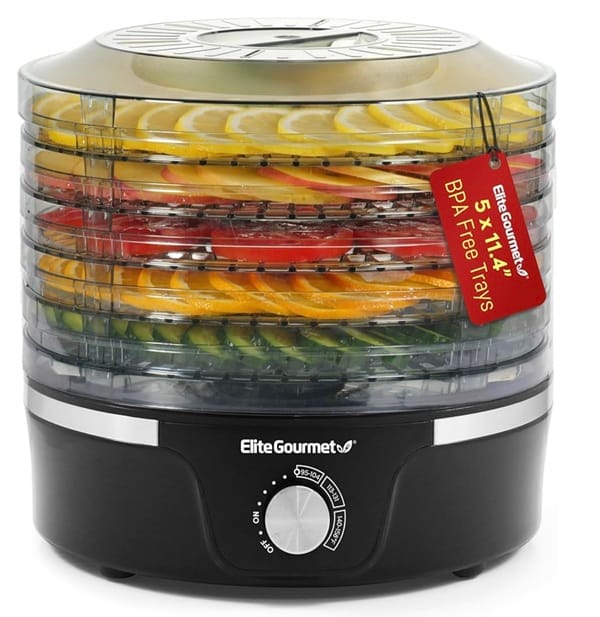
1. Using a Food Dehydrator
A food dehydrator provides the best results as it removes moisture at a consistent temperature.
- Steps:
- Slice fruits, vegetables, or meats evenly.
- Arrange pieces on the dehydrator tray.
- Set temperature (125-135°F for fruits/veggies, 145-160°F for meats).
- Dry for several hours (4-12 hours, depending on thickness).
- Store in airtight containers with desiccant packets.
- Some vegetables are mushrooms, beans and okra. Fruits can be peaches, plums, sliced apples, apricots, etc.
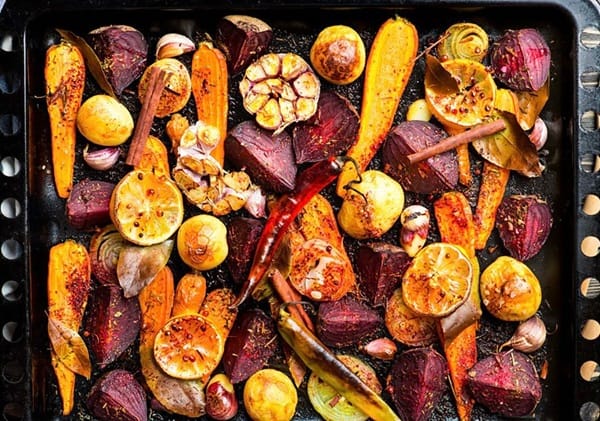
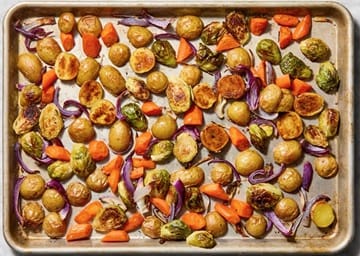
2. Drying in an Oven
If you don’t have a dehydrator, your oven can do the job.
To dehydrate food in your oven, preheat it to the lowest temperature possible (ideally around 140°F or 60°C), place food in a single layer on baking sheets lined with parchment paper, and prop the oven door slightly open with a wooden spoon to allow moisture to escape. Here's a more detailed guide:
1. Preparation:
- Choose your food: You can dehydrate a variety of foods, including fruits, vegetables, herbs, and even meat.
- Wash and prepare: Thoroughly wash and prepare your food, ensuring it's clean and free from bruises or damage.
- Slice or cut: Slice or cut your food into thin, uniform pieces to ensure even drying.
- Line baking sheets: Place parchment paper on your baking sheets to prevent sticking and make cleanup easier.
2. Dehydration Process:
- Preheat oven: Set your oven to the lowest temperature it can reach, ideally around 140°F (60°C).
- Arrange food: Place your food in a single layer on the prepared baking sheets.
- Prop open the door: Use a wooden spoon to prop the oven door open slightly, allowing moisture to escape.
- Monitor and dry: Check on your food periodically and remove it when it's completely dry and brittle, which can take 6-10 hours or longer, depending on the food and oven.
- Steps guide:
- Set oven temperature to the lowest setting (140-170°F).
- Slice produce or meat thinly and place on baking sheets.
- Keep the oven door slightly open for air circulation.
- Dry for 4-8 hours, checking for crispness.
- Turn them over and repeat the process a couple of times to get the maximum crispness
3. Sun Drying (Best for Hot, Dry Climates)
- Steps:
- Place thinly sliced fruits or vegetables on drying racks.
- Cover with cheesecloth to keep insects away.
- Leave in the sun for several days, turning pieces for even drying.
4. Air Drying (Best for Herbs and Leafy Greens)
- Steps:
- Tie herb bunches together and hang upside down in a dry, ventilated area.
- Once dry, crumble and store in airtight containers.
How to Store Dried Food Properly
- Store in airtight containers (glass jars, vacuum-sealed bags, Mylar bags).
- Use desiccant packets to absorb moisture and extend shelf life.
- Keep in a cool, dark place to prevent spoilage.
- Label containers with dates to track freshness.
How to Use Dried Foods in Everyday Meals
- Rehydrate vegetables and meat in warm water before adding to soups, stews, pasta, and stir-fries.
- Add dried fruits to cereals, smoothies, baked goods, and salads.
- Use dried herbs in cooking for enhanced flavor.
- Make homemade spice blends with dried herbs and vegetables.
Can Bakeries and Food Manufacturers Benefit from Surplus Drying?
Absolutely! Bakeries and food manufacturers can buy surplus perishables at a discount and repurpose them into long-lasting ingredients.
- Dried fruits can be used in bread, muffins, cookies, and granola.
- Dried vegetables can be turned into vegetable powders for soups and sauces.
- Dried meats and seafood can be used for making snacks like jerky or meat-flavored seasonings.
Additional Information on Drying Methods, Equipment, and Recipes
Drying food at home is an effective way to reduce waste and save money. Below, we will dive deeper into the best equipment for drying, detailed drying times, and recipes to use dried ingredients creatively.
Best Equipment for Drying Food
1. Food Dehydrators (Best for All-Purpose Drying)
- Recommended for: Fruits, vegetables, meat, seafood, and herbs.
- Benefits:
- Provides even airflow and temperature control.
- Efficient and energy-saving compared to an oven.
- Multiple trays allow drying in bulk.
- Top Picks:
- Excalibur 9-Tray Dehydrator – Best for large batches.
- Nesco Snackmaster Pro – Affordable and compact.
- COSORI Premium Dehydrator – Great for beginners.
2. Oven Drying (Best for Small Batches & Occasional Use)
- Recommended for: Fruits, vegetables, meats, and dairy (like cheese).
- How to Use:
- Set to the lowest temperature (140-170°F).
- Use a baking sheet lined with parchment paper.
- Keep the oven door slightly open for airflow.
- Tip: Place a fan near the oven door for better air circulation.
3. Sun Drying (Best for Hot, Dry Climates)
- Recommended for: Fruits (apples, tomatoes, peaches, figs) and some vegetables.
- How to Use:
- Slice fruits thinly and place on drying racks.
- Cover with mesh or cheesecloth to keep bugs away.
- Turn pieces every few hours.
- Drying takes 2-5 days depending on weather conditions.
4. Air Drying (Best for Herbs & Leafy Greens)
- Recommended for: Herbs, leafy greens, and chili peppers.
- How to Use:
- Tie small bunches together with twine.
- Hang upside down in a dry, well-ventilated area.
- Drying takes 1-2 weeks.
Drying Times for Various Foods
| Food | Dehydrator Time (Hours) | Oven Time (Hours) | Sun Drying Time (Days) |
|---|---|---|---|
| Apples | 6-12 hrs @ 135°F | 6-8 hrs @ 170°F | 2-3 days |
| Bananas | 8-12 hrs @ 135°F | 6-8 hrs @ 170°F | 2-4 days |
| Tomatoes | 8-12 hrs @ 135°F | 6-8 hrs @ 170°F | 3-5 days |
| Carrots | 6-10 hrs @ 135°F | 6-8 hrs @ 170°F | 2-3 days |
| Onions | 6-8 hrs @ 135°F | 5-7 hrs @ 170°F | Not recommended |
| Herbs | 1-3 hrs @ 95°F | 2-3 hrs @ lowest setting | 1-2 weeks |
| Chicken (Jerky) | 4-6 hrs @ 160°F | 6-8 hrs @ 170°F | Not recommended |
| Fish (Jerky) | 6-12 hrs @ 160°F | 6-10 hrs @ 170°F | Not recommended |
Tips for Properly Storing Dried Food
To prevent mold and spoilage, dried food must be stored correctly:
- Use airtight containers: Mason jars, Mylar bags, vacuum-sealed pouches.
- Add desiccant packets: These absorb any remaining moisture and keep food dry.
- Label with drying date: Helps track freshness.
- Store in a cool, dark place: Pantry, cupboard, or basement.
- Check periodically: If food softens, re-dry for longer storage.
Creative Ways to Use Dried Food
1. Homemade Instant Soup Mix
Mix dried vegetables (carrots, onions, mushrooms), dried chicken, and herbs in a jar. Just add hot water for an easy soup.
2. DIY Trail Mix
Combine dried fruits (apples, bananas, raisins), nuts, and chocolate chips for a healthy snack.
3. Rehydrated Meat for Cooking
Soak dried chicken, beef, or fish in warm water for 20-30 minutes before adding to soups, stews, or pasta.
4. Dried Tomato & Herb Seasoning
Blend dried tomatoes, basil, garlic, and onion powder for a homemade pasta seasoning.
5. Dried Fruit Infused Water & Smoothies
Soak dried oranges, berries, or apples in water overnight for a refreshing drink. Or blend with milk for a smoothie.
6. Homemade Jerky (Meat & Fish)
Marinate thinly sliced beef, chicken, or salmon in:
- Soy sauce, garlic, honey, pepper, and vinegar
- Dry in a dehydrator at 160°F for 4-6 hours
7. Herb & Vegetable Powder
Grind dried spinach, carrots, or herbs into powder. Add to soups, smoothies, or homemade pasta dough.
Final Thoughts
Drying food is an easy and effective way to reduce waste, save money, and create a sustainable food supply. Whether you use a dehydrator, oven, or sun drying, you can preserve fruits, vegetables, meat, seafood, and herbs for long-term use.
Conclusion
Drying food is a simple, cost-effective way to preserve surplus produce, meat, and dairy while reducing waste. Whether through home dehydration or large-scale food processing, repurposing surplus food creates a sustainable food system, promotes food security, and saves money. By making use of discounted perishables from grocery liquidators, farms, and food distributors, anyone can build a long-term food supply and help combat food waste.


